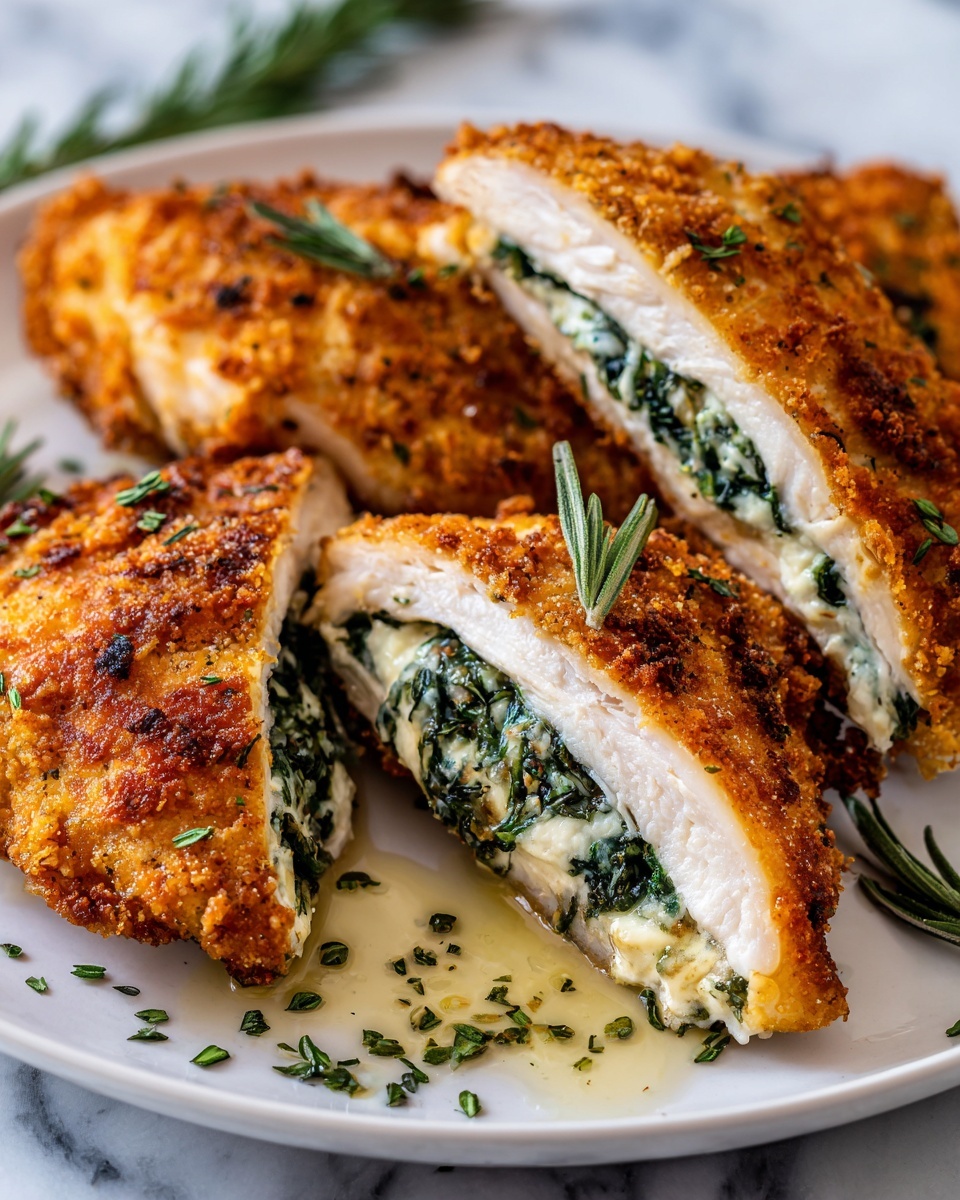
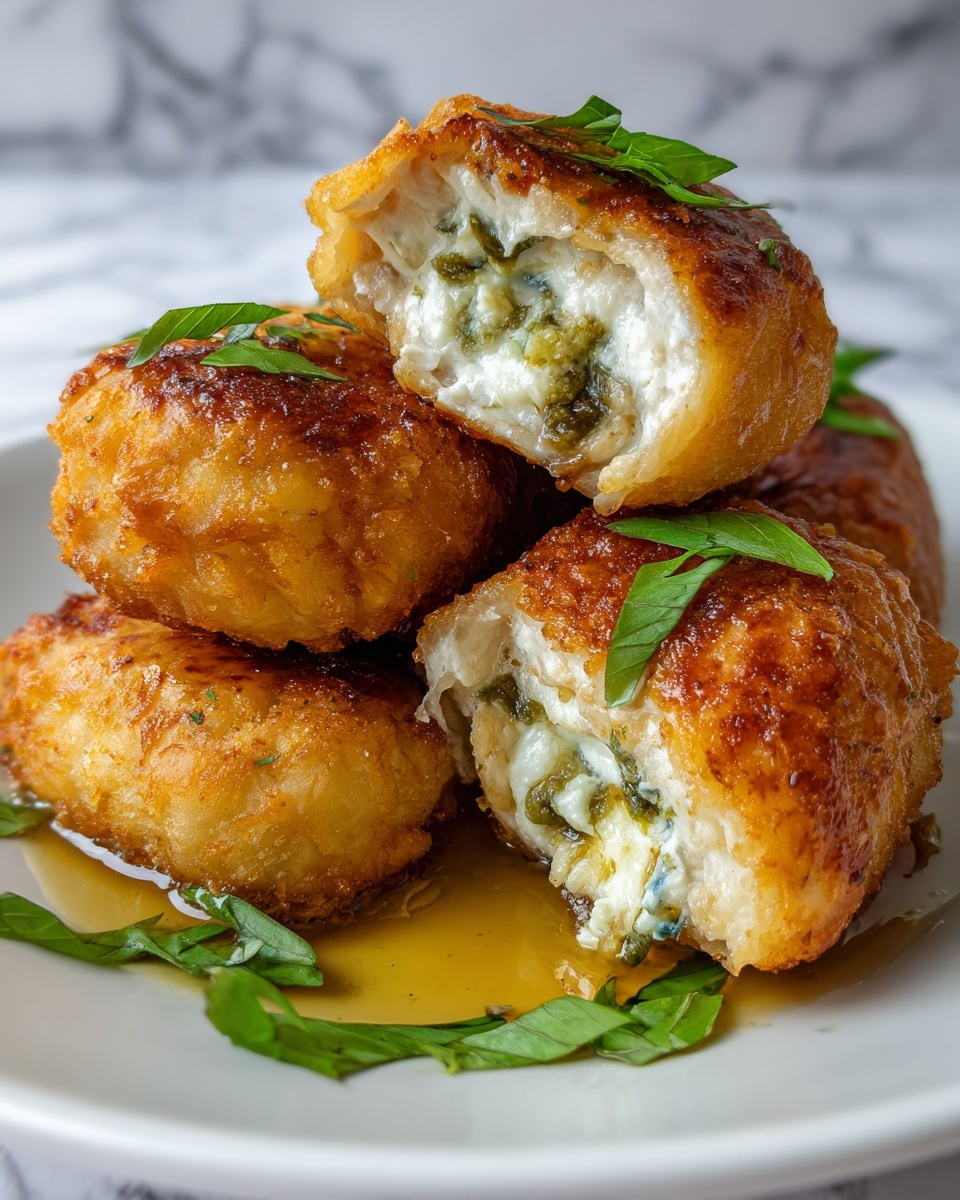
If you have ever dreamed of a dish that combines tender, juicy chicken with a luscious, garlicky buttery center that oozes out with every bite, then this Chicken Kiev with Garlic Butter Recipe is exactly what you need in your life. This classic comfort food transforms simple ingredients into an unforgettable meal bursting with flavor, texture, and a bit of culinary theater. It’s crispy on the outside, rich and creamy on the inside, and perfect for impressing guests or treating yourself to something extraordinary at home.
Ingredients You’ll Need
This Chicken Kiev with Garlic Butter Recipe shines because of its straightforward, quality ingredients. Each element plays an essential role—from the fragrant garlic butter filling to the crunchy panko coating—ensuring balance in flavor and texture that’ll have you coming back for seconds.
- 90g unsalted butter, softened: The creamy base for the garlic butter filling that melts beautifully inside the chicken.
- 2 teaspoons finely chopped fresh parsley: Adds a fresh, herbaceous brightness to counter the richness.
- 2 cloves garlic, finely minced: Delivers that beloved punch of garlic flavor enticing your senses.
- ¼ teaspoon salt: Enhances the savory elements in the butter; adjust if using salted butter.
- 2 chicken breasts, skinless and boneless: The star protein, tenderized for even cooking.
- ½ teaspoon salt and ¼ teaspoon freshly ground black pepper: Basic seasoning to bring out the chicken’s natural flavor.
- 1 large egg, lightly whisked: Helps the breadcrumbs adhere perfectly for a crispy crust.
- ¼ cup all-purpose flour: Creates a dry layer for the egg to cling to, ensuring the coating stays put.
- 1 cup panko breadcrumbs: Gives that irresistible, airy crunch you want on the outside.
- Canola or vegetable oil for frying (about 1 liter): Provides the hot cooking medium for a perfectly golden finish.
- Finely chopped parsley for garnish: Adds a lovely color accent and fresh aroma to your plated dish.
How to Make Chicken Kiev with Garlic Butter Recipe
Step 1: Prepare the Garlic Butter Filling
Start by combining softened butter with chopped parsley, minced garlic, and salt in a bowl until evenly mixed. This garlic butter is the heart of the dish—it’s what makes every bite so luscious and flavorful. Spread this mixture onto baking paper in a neat rectangle, chill until firm, then slice it into two perfect butter batons that will fit snugly inside each chicken breast.
Step 2: Pound and Season the Chicken
Lay each chicken breast between parchment sheets and gently pound them with a meat mallet to about half a centimeter thickness. This even thickness helps the chicken cook uniformly and makes it easier to roll. Season both sides with salt and freshly ground pepper to build a simple yet essential layer of flavor.
Step 3: Stuff and Roll the Chicken
Place one butter baton in the center of each flattened chicken breast. Fold the sides over the butter, then roll tightly to encase the garlic butter. Ensuring the seam is tucked underneath is crucial for keeping the butter sealed inside during cooking. Wrap each roll firmly in cling film and pop them into the freezer until the butter firms up but doesn’t freeze completely—about 30 minutes.
Step 4: Bread the Chicken
Setup a classic breading station with three bowls: flour, whisked egg, and panko breadcrumbs. Unwrap the chicken rolls and evenly coat each with flour, then egg, allowing excess to drip off, and finally press into the panko breadcrumbs for a crunchy crust. After breading, freeze the chicken again for 30 minutes to help the coating adhere and set before frying.
Step 5: Fry and Bake
Preheat your oven to 180°C (350°F) and heat oil to 190°C (375°F) in a heavy pot. Carefully lower the chicken rolls into the hot oil and fry for 2-3 minutes per side until beautifully golden and crisp. Transfer the chicken to a rack over a baking sheet and finish cooking in the oven for 15 minutes or until the internal temperature reaches 65°C (150°F). Let the chicken rest for a couple of minutes after cooking—this step lets the juices redistribute for optimum tenderness.
Step 6: Serve and Enjoy
Just before serving, sprinkle your Chicken Kiev with Garlic Butter Recipe with fresh chopped parsley for a pop of color and fresh aroma—the perfect finishing touch for such a rich and satisfying dish.
How to Serve Chicken Kiev with Garlic Butter Recipe
Garnishes
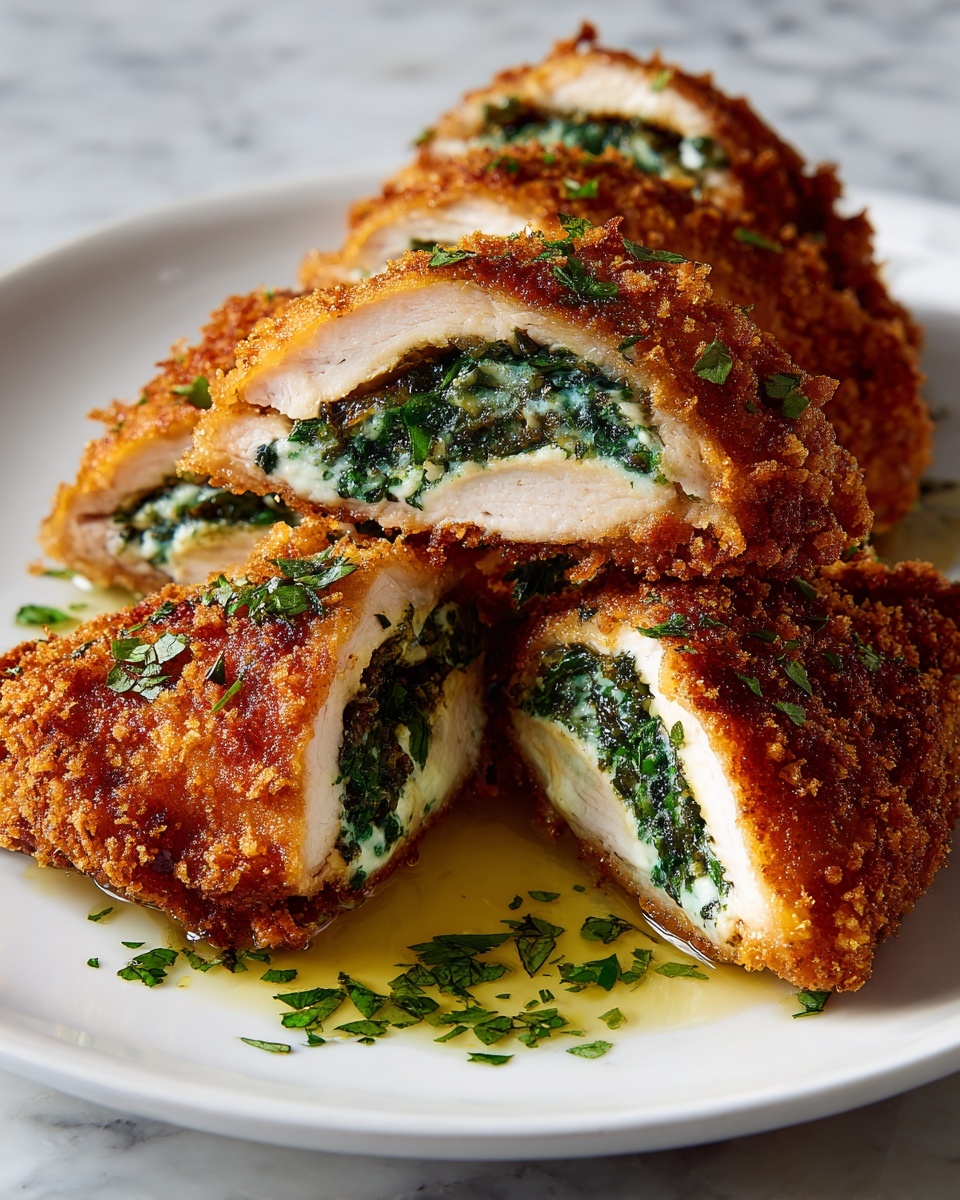
Freshly chopped parsley is classic here because it cuts through the richness and adds a lovely visual lift. You can also consider a wedge of lemon for a fresh, zesty counterpoint that some guests adore.
Side Dishes
This dish pairs beautifully with light, simple side dishes that don’t overpower its delicate flavors. Think creamy mashed potatoes, buttered green beans, or a crisp mixed green salad with a citrus vinaigrette. Roasted baby carrots or sautéed asparagus also add a delightful color contrast and texture balance.
Creative Ways to Present
For a special occasion, slice the chicken rolls diagonally to display the inviting garlic butter center oozing out. Arrange the slices on a warmed plate with a drizzle of herb-infused olive oil to elevate the presentation further. Serving on a rustic wooden board with fresh herbs scattered around invites a cozy, casual vibe perfect for sharing.
Make Ahead and Storage
Storing Leftovers
If you find yourself lucky enough to have leftovers, store them in an airtight container in the refrigerator. Chicken Kiev is best enjoyed within 2 days to preserve that juicy texture and buttery flavor.
Freezing
This Chicken Kiev with Garlic Butter Recipe freezes wonderfully before cooking. Wrap the prepared and breaded chicken rolls tightly in cling film and freeze them for up to 1 month. When you’re ready, simply fry and bake straight from the freezer, adjusting cooking time slightly to ensure thorough cooking.
Reheating
To reheat without losing the lovely crispness, place leftovers on a wire rack in a 180°C (350°F) oven for 10-15 minutes until warmed through. Avoid microwaving, which can make the coating soggy and cause the garlic butter to leak out prematurely.
FAQs
Can I make the garlic butter filling in advance?
Absolutely! The garlic butter filling can be made and refrigerated for up to 2 days ahead. Just make sure to keep it covered tightly to prevent it from picking up other flavors, so it stays pure and fresh inside your chicken rolls.
What’s the best way to prevent the butter from leaking out?
Ensuring the chicken is rolled tightly with the seam tucked underneath is key. Wrapping the rolls in cling film and chilling or freezing before breading and cooking helps the butter firm up and stay sealed until cooking releases that beautiful, molten center.
Can I bake Chicken Kiev without frying first?
While frying creates that signature crispy crust, you can bake the chicken rolls directly if you prefer a lighter cooking method, though the crust won’t be as golden or crunchy. Spritzing the rolls with a little oil before baking can help improve texture.
Is panko breadcrumb essential, or can I use regular breadcrumbs?
Panko breadcrumbs are preferred for their light, airy crunch. Regular breadcrumbs work in a pinch but will produce a denser, less crispy coating. If you want the ultimate crunch in your Chicken Kiev with Garlic Butter Recipe, panko is worth the extra step.
How do I know when the chicken is fully cooked?
The safest way is to use a meat thermometer to check that the internal temperature reaches 65°C (150°F). The chicken should be opaque and juices run clear. Letting the chicken rest after cooking helps finalize the perfect juicy texture.
Final Thoughts
There’s something truly magical about making Chicken Kiev with Garlic Butter Recipe at home—it takes just a bit of effort and patience, but the reward is a stunning dish filled with crispy, golden indulgence and a buttery garlic center that’s simply unbeatable. I encourage you to dive in, try this recipe, and share the joy of a classic meal that’s guaranteed to delight every time you serve it.
Print
Chicken Kiev with Garlic Butter Recipe
- Prep Time: 20 minutes
- Cook Time: 25 minutes
- Total Time: 1 hour
- Yield: 2 servings
- Category: Main Course
- Method: Frying
- Cuisine: European
Description
Chicken Kiev with Garlic Butter is a classic dish featuring tender chicken breasts stuffed with a flavorful garlic parsley butter, then breaded and cooked to golden perfection. This recipe combines frying and baking techniques to achieve a crispy crust while keeping the buttery filling deliciously melted inside. Ideal for special dinners or an impressive homemade meal.
Ingredients
For the Garlic Butter Filling:
- 90g unsalted butter, softened
- 2 teaspoons finely chopped fresh parsley
- 2 cloves garlic, finely minced (approximately 2 teaspoons)
- ¼ teaspoon salt (omit if using salted butter)
For the Chicken:
- 2 chicken breasts (220-250g each), skinless and boneless
- ½ teaspoon salt
- ¼ teaspoon freshly ground black pepper
- 1 large egg, lightly whisked
- ¼ cup all-purpose flour
- 1 cup panko breadcrumbs
- Canola or vegetable oil for frying (approximately 1 liter)
For Serving:
- Finely chopped parsley for garnish
Instructions
- Prepare the Garlic Butter Filling: In a bowl, combine softened butter, chopped parsley, minced garlic, and salt. Mix until thoroughly combined.
- Shape the Butter: Place the butter mixture onto a sheet of baking paper, shaping it into a rectangle approximately 10×6 cm.
- Refrigerate and Cut Butter Batons: Refrigerate until firm, then cut the butter into two equal batons lengthwise.
- Prepare the Chicken Breast: Lay the chicken breasts smooth side down between two sheets of parchment paper.
- Pound Chicken Evenly: Using a meat mallet, gently pound each breast to an even thickness of about 0.5 cm.
- Season Chicken: Season both sides with salt and pepper.
- Stuff and Roll the Chicken: Place one butter baton in the center of each flattened chicken breast.
- Fold and Roll: Fold the sides of the chicken over the butter, then roll it up tightly, ensuring the seam is on the underside.
- Wrap in Cling Film: Wrap each roll tightly in cling film, twisting the ends to form a firm log shape.
- Freeze Rolls: Freeze for 30 minutes until firm but not fully frozen.
- Set Up Breading Stations: Set up three bowls: one with flour, one with the whisked egg, and one with panko breadcrumbs.
- Remove Wrapping and Coat: Remove the chicken rolls from the cling film.
- Flour Coating: Coat each roll first in flour, shaking off excess.
- Egg Dip: Dip in egg, letting excess drip off.
- Panko Breadcrumb Coating: Roll in breadcrumbs, pressing gently to adhere.
- Freeze Again: Return the breaded chicken to the freezer for another 30 minutes to firm up.
- Preheat Oven: Preheat the oven to 180°C (350°F).
- Heat Oil for Frying: Heat oil in a heavy-based pot to 190°C (375°F).
- Fry Chicken Rolls: Carefully lower the chicken into the hot oil and cook until golden brown, approximately 2-3 minutes per side.
- Drain and Bake: Transfer the fried chicken to a rack set over a baking sheet.
- Bake to Finish Cooking: Bake in the preheated oven for 15 minutes or until the internal temperature reaches 65°C (150°F).
- Rest: Allow the chicken to rest for 2 minutes before serving.
- Serve: Garnish with finely chopped parsley and serve hot.
Notes
- Freezing the chicken rolls before breading and after breading helps maintain their shape and prevents the butter from leaking during cooking.
- Make sure the oil temperature is accurate at 190°C to ensure proper frying without absorbing excess oil.
- Use a meat thermometer to check the internal temperature for safe and perfect doneness.
- You can substitute panko breadcrumbs with regular breadcrumbs but panko provides a crispier texture.
- Butter can be flavored further by adding lemon zest or other herbs to the garlic butter mix for variation.

