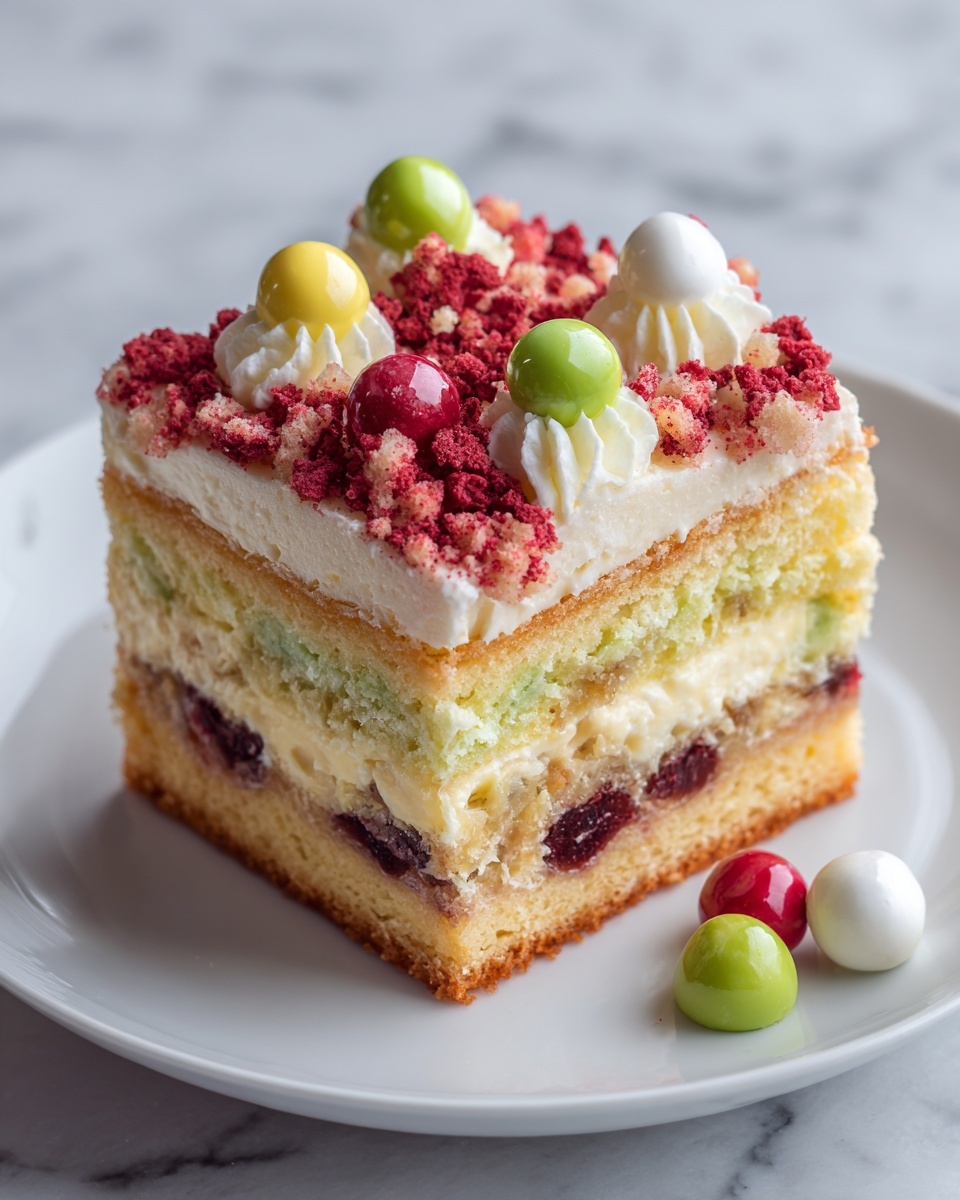
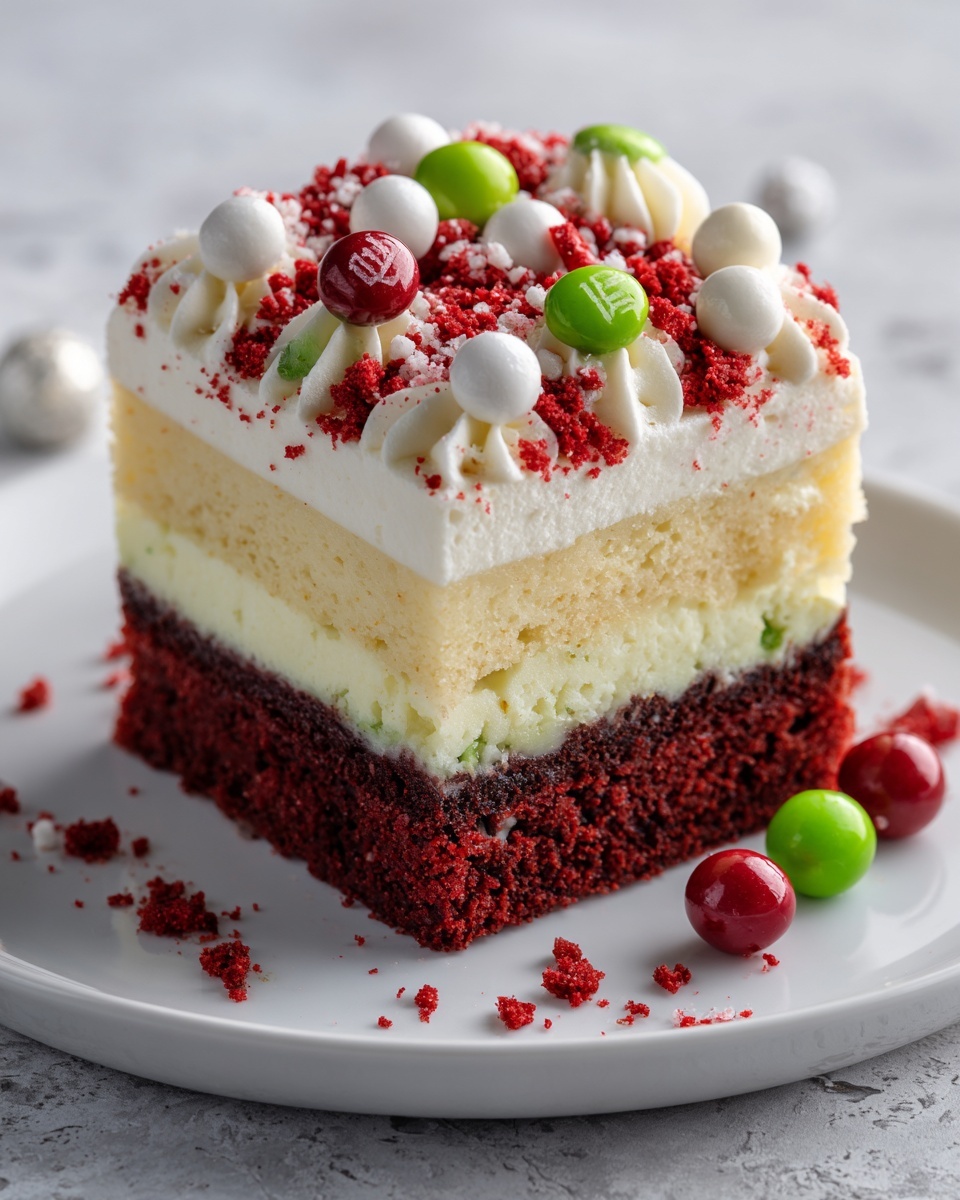
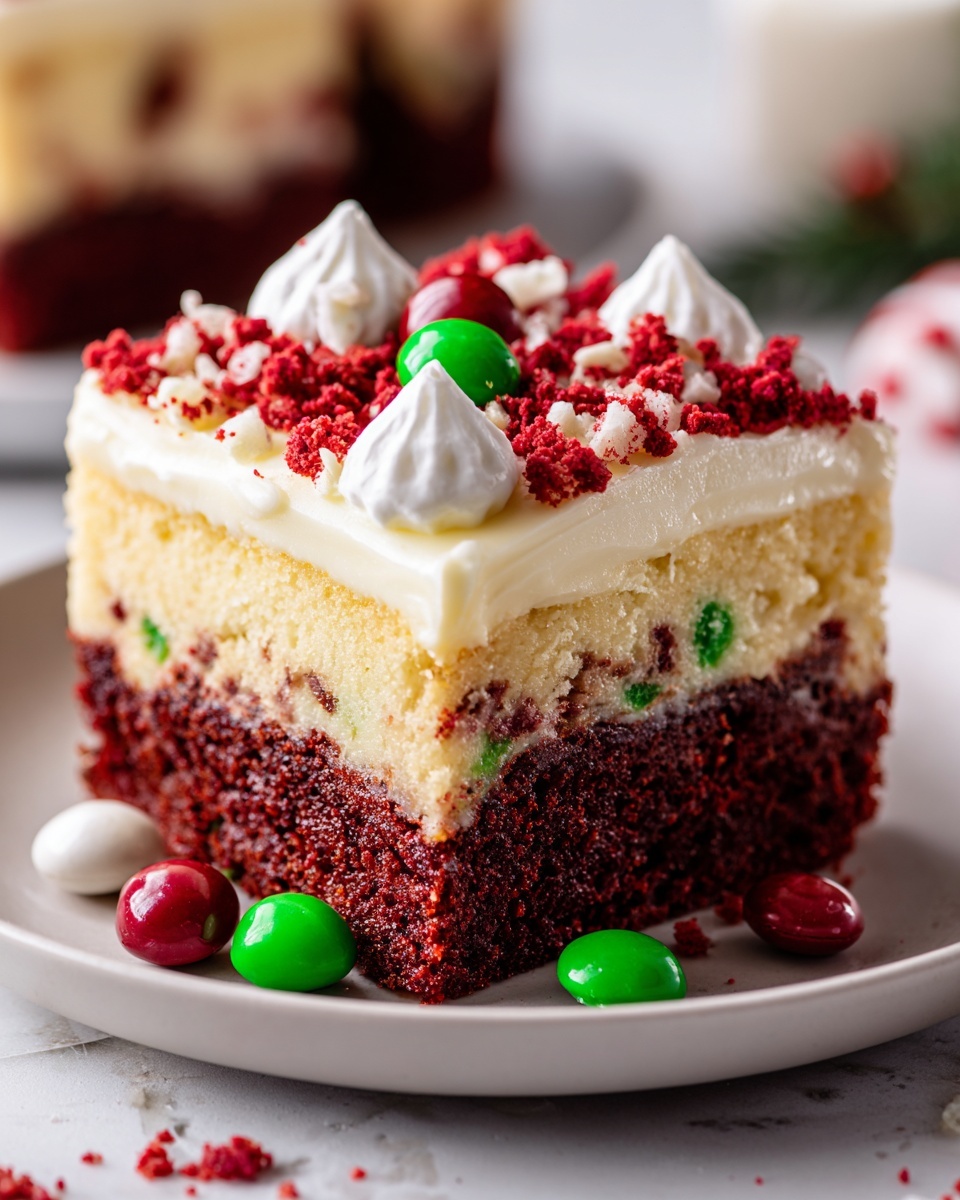
If you are looking for a dessert that captures the vibrant spirit of the season with every bite, this Christmas Poke Cake Recipe is a must-try. It combines the light fluffiness of a white cake with the joyful bursts of red and green gelatin, lodging sweet pockets of flavor throughout. This cake is not only visually stunning but also deliciously refreshing and fun to make, making it a perfect centerpiece for your holiday celebrations that will have everyone asking for seconds.
Ingredients You’ll Need
The beauty of this Christmas Poke Cake Recipe lies in its simple yet essential ingredients, each playing a crucial role in building the texture, color, and festive taste that make this dessert unforgettable. These pantry staples come together effortlessly, ensuring the process is as joyful as the end result.
- White cake mix: Provides a light and fluffy base that complements the gelatin perfectly.
- Egg whites, oil, and water: Typically required for the cake mix; important for achieving the right batter consistency.
- Red gelatin (cherry or strawberry): Adds vibrant red pockets of sweet, fruity flavor for a festive punch.
- Green gelatin (lime): Offers a refreshing contrast in color and taste to the red gelatin.
- Boiling water: Needed to dissolve the gelatin completely and create those signature poke cake fillings.
- Cold water: Helps cool the gelatin before pouring it onto the cake to prevent it from melting the cake.
- Whipped topping: Adds a creamy, airy finish that balances the tangy jello flavors.
- Holiday sprinkles or crushed peppermint (optional): Perfect for adding festive crunch and an extra dash of holiday cheer.
How to Make Christmas Poke Cake Recipe
Step 1: Prepare and Bake the Cake
Begin by preheating your oven according to the cake mix instructions and greasing a 9×13-inch baking dish. Prepare the white cake batter following the box directions, then pour it into your dish and bake until golden and springy—a standard white cake with a delightfully soft crumb is the perfect base for this dessert.
Step 2: Poke Holes in the Cake
Once the cake has cooled for about 15 minutes, take the handle of a wooden spoon and gently poke holes all over the surface. These holes are essential as they will hold the colorful gelatin, making every bite unique and festive.
Step 3: Prepare the Gelatin Mixtures
In two separate bowls, dissolve the red and green gelatin powders each in 1 cup of boiling water. Stir until fully dissolved, then stir in 1/2 cup of cold water into each bowl to cool the gelatin slightly, ensuring it doesn’t melt the cake when poured.
Step 4: Pour Gelatin into Cake Holes
Alternately pour the red and green gelatin mixtures over the holes in the cake, making sure to spread them evenly for that beautiful holiday checkerboard effect. Cover your cake and pop it into the refrigerator for at least four hours, allowing the gelatin to set and infuse the cake with zesty color and flavor.
Step 5: Add the Whipped Topping and Garnish
Once your cake is perfectly chilled and the gelatin is firm, spread an even layer of whipped topping across the surface. For a finishing touch, sprinkle holiday sprinkles or crushed peppermint over the top for texture and an extra festive vibe that will wow anyone lucky enough to try it.
How to Serve Christmas Poke Cake Recipe
Garnishes
Simple garnishes elevate this already show-stopping cake beautifully. Consider adding extra peppermint pieces, festive colored sugar, or even edible glitter. These details add texture and sparkle, making your Christmas Poke Cake Recipe the star of your holiday dessert table.
Side Dishes
This cake pairs wonderfully with lightly sweetened whipped cream, a scoop of vanilla ice cream, or even a handful of fresh berries. These sides complement the tart gelatin flavors while keeping the overall dessert light and refreshing.
Creative Ways to Present
For an eye-catching presentation, serve slices of your Christmas Poke Cake Recipe on holiday-themed plates or decorate your serving tray with pine sprigs and cranberries. You might also consider cutting the cake into festive shapes using cookie cutters before serving to add an extra fun twist.
Make Ahead and Storage
Storing Leftovers
Your Christmas Poke Cake Recipe keeps beautifully in the refrigerator for up to three days when covered tightly. This makes it a great make-ahead option for busy holiday schedules without sacrificing its fresh taste.
Freezing
While this cake can be frozen, keep in mind that the texture of the gelatin may change slightly upon thawing. If you choose to freeze it, wrap the cake tightly in plastic wrap and aluminum foil to avoid freezer burn, and thaw overnight in the refrigerator before serving.
Reheating
This cake is best enjoyed cold or at room temperature. Reheating is not recommended since the gelatin could melt and lose its delightful texture and vibrant appearance.
FAQs
Can I use other gelatin flavors for this cake?
Absolutely! While the classic red and green flavors create a festive look, you can experiment with other colors and flavors like blueberry or orange to suit your personal taste or match different holiday themes.
Is it possible to make this cake gluten-free?
Yes! Use a gluten-free white cake mix in place of the regular one, and ensure your gelatin and whipped topping are also gluten-free for a delicious alternative that everyone can enjoy.
Can I make this cake without gelatin?
Gelatin is key for achieving the signature poke cake pockets, but if you need a substitute, consider using a no-bake fruit filling or pudding. Keep in mind this will change the texture and appearance somewhat.
How far in advance can I prepare this cake?
You can prepare this Christmas Poke Cake Recipe up to a day in advance, making it a convenient option for holiday entertaining. Store it covered in the refrigerator until you’re ready to serve.
Can I add peppermint extract to the whipped topping?
Yes! Adding a drop of peppermint extract to the whipped topping enhances the holiday flavor profile and pairs wonderfully with the crushed peppermint garnish for an extra festive touch.
Final Thoughts
This Christmas Poke Cake Recipe is the kind of dessert that brings smiles and holiday cheer to any gathering. Its blend of bright colors, refreshing flavors, and creamy textures makes it irresistibly festive and fun. I promise this cake will become a beloved tradition once you try it, so go ahead and make it your own this season—it’s holiday magic in every slice!
Print
Christmas Poke Cake Recipe
- Prep Time: 25 minutes
- Cook Time: 30 minutes
- Total Time: 4 hours 55 minutes
- Yield: 12 servings
- Category: Dessert
- Method: Baking
- Cuisine: American
- Diet: Vegetarian
Description
This festive Christmas Poke Cake combines a moist white cake base with vibrant red and green gelatin poked into the cake, creating colorful pockets of flavor and a delightful texture. Topped with whipped topping and holiday sprinkles or crushed peppermint, this dessert is perfect for holiday gatherings and celebrations.
Ingredients
Cake
- 1 box white cake mix (plus ingredients called for on box: typically egg whites, oil, and water)
Gelatin
- 1 (3 oz) box red gelatin (cherry or strawberry)
- 1 (3 oz) box green gelatin (lime)
- 2 cups boiling water (divided)
- 1 cup cold water (divided)
Topping
- 1 (8 oz) tub whipped topping (thawed)
- Holiday sprinkles or crushed peppermint for garnish (optional)
Instructions
- Prepare and Bake Cake: Preheat the oven according to the cake mix instructions and grease or spray a 9×13-inch baking dish. Mix and bake the white cake as directed on the box. Allow the cake to cool for about 15 minutes until slightly warm but safe to handle.
- Pokethe Cake: Using the handle of a wooden spoon, poke holes evenly all over the surface of the cake. This step allows the gelatin to seep into the cake for moist, colorful pockets.
- Dissolve Gelatin: In two separate bowls, dissolve the red and green gelatin powders each in 1 cup of boiling water. Stir until fully dissolved, then add 1/2 cup of cold water to each bowl to cool the gelatin mixture slightly.
- Pour Gelatin into Cake: Carefully alternate pouring red gelatin into half of the holes and green gelatin into the remaining holes for a festive pattern. Pour slowly to allow gelatin to sink into the holes without overflowing.
- Chill the Cake: Cover the cake and refrigerate it for at least 4 hours or until the gelatin is fully set and the cake is chilled through.
- Add Whipped Topping and Garnish: Spread the thawed whipped topping evenly over the top of the chilled cake. Optionally, sprinkle with holiday sprinkles, crushed peppermint, or colored sugar for extra festive flair.
- Serve: Slice the cake into 12 servings and serve chilled. Store leftovers covered in the refrigerator.
Notes
- This cake can be prepared up to a day in advance and stored covered in the refrigerator.
- For enhanced flavor, use flavored whipped topping or add a drop of peppermint extract to the topping.
- Cream cheese frosting can be used instead of whipped topping for a richer finish.


