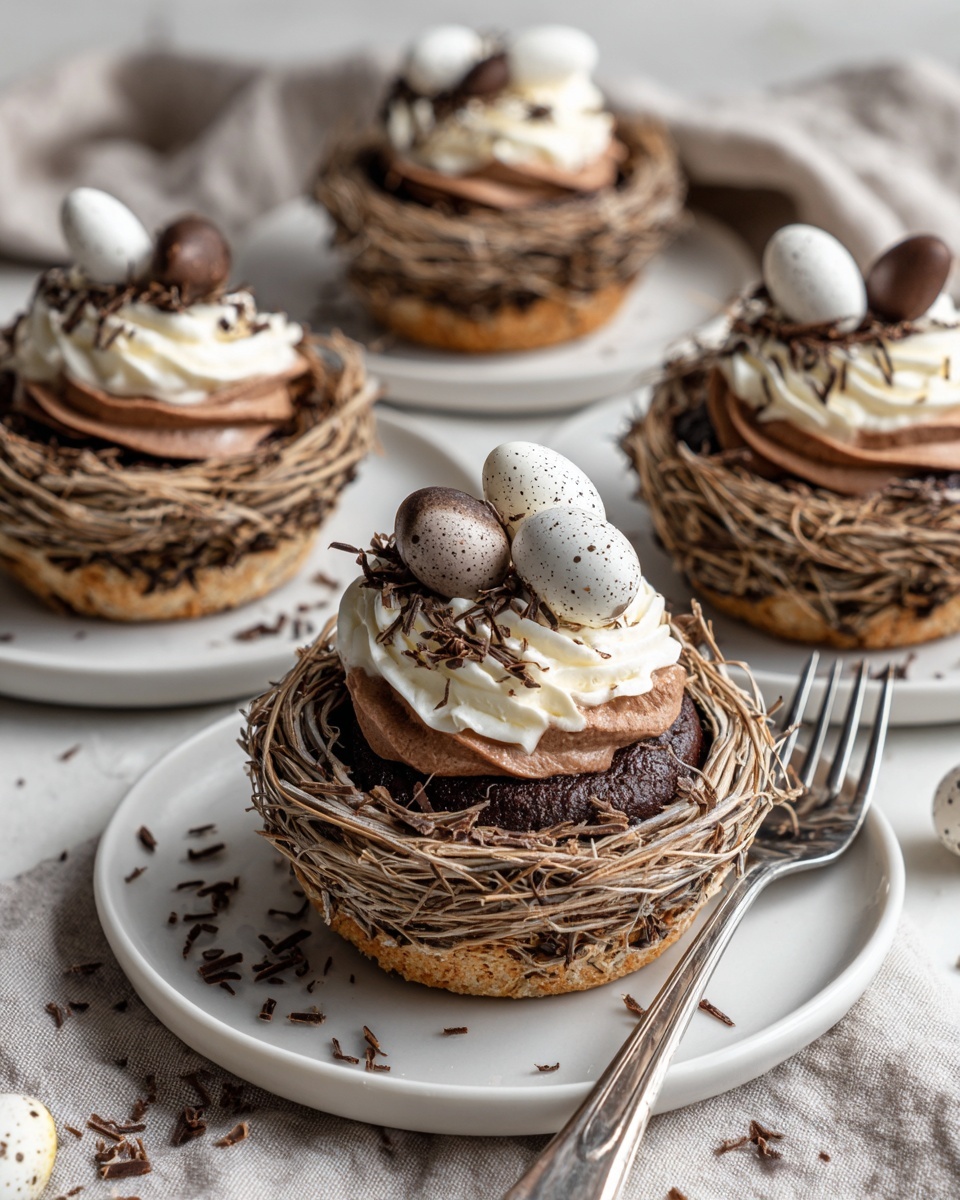
If you’re looking to wow your friends and family this Easter with something both stunning and scrumptious, you have to try this Delightful Chocolate Meringue Easter Nests Recipe. These airy, melt-in-your-mouth nests bring together the light sweetness of meringue and the rich depth of cocoa, all topped off with a crunchy, colorful candy filling that feels just as festive as it tastes. Whether you’re new to baking meringues or a seasoned pro, this recipe is approachable yet show-stopping, perfect for sharing holiday cheer in the sweetest way possible.
Ingredients You’ll Need
Every ingredient in this Delightful Chocolate Meringue Easter Nests Recipe plays a special role, ensuring your nests hold their shape, deliver delicate texture, and carry that irresistible chocolate flavor. Plus, each one is simple and easy to find, making your baking experience fun rather than complicated.
- 4 large egg whites: The foundation of your meringue, these provide volume and that signature light texture when whipped properly.
- 1 cup granulated sugar: Sweetens the egg whites while stabilizing the meringue for perfect peaks.
- 2 tablespoons cocoa powder: Adds rich chocolate flavor and gives your nests a beautiful deep color.
- 4 oz dark chocolate (melted): A decadent drizzle that enhances the nests with smooth, glossy chocolate goodness.
- Mini eggs or colorful candies for filling: Brings vibrant color and a fun crunch, making each bite delightfully festive.
How to Make Delightful Chocolate Meringue Easter Nests Recipe
Step 1: Preheat and Prepare Your Baking Sheet
Start by setting your oven to a gentle 225°F (110°C), then line a baking sheet with parchment paper. This low heat will help your nests dry out slowly without browning, so they keep their signature soft interior while becoming crisp outside. The parchment ensures they won’t stick and slide when cooling.
Step 2: Whip Egg Whites to Stiff Peaks
Using a clean, dry bowl, beat your egg whites until frothy. Patience is key here: once frothy, gradually sprinkle in the sugar while continuing to beat. Whip for 5 to 7 minutes until the mixture holds stiff, glossy peaks that don’t droop when you lift the whisk—this is the secret to getting those perfect, stable nests.
Step 3: Fold in Cocoa Powder Gently
Sprinkle your cocoa powder over the whipped egg whites and carefully fold it in. The goal is to incorporate the chocolate flavor evenly without deflating your airy meringue, so take your time and use gentle motions.
Step 4: Shape Your Nests
Using a spoon, dollop circular mounds of meringue onto the baking sheet. Then create little indents in the center of each mound to form the classic nest shape. Aim for about 2 inches high so they have enough volume to be impressive yet stable.
Step 5: Bake and Cool
Place your tray in the oven for roughly 1 hour. The nests should be dry to the touch on the outside but softly tender inside. Once baked, allow them to cool completely on the sheet before attempting to move them. This cooling period helps them firm up and prevents cracking.
Step 6: Drizzle and Fill
Finally, drizzle the melted dark chocolate over your cooled nests for a glossy finishing touch. Fill each nest with mini eggs or your choice of colorful candies for that extra pop of Easter joy. This finishing step truly transforms your meringues into delightful little edible works of art.
How to Serve Delightful Chocolate Meringue Easter Nests Recipe
Garnishes
Sprinkle a little powdered sugar over your nests before serving to add a delicate snowy look. Fresh mint leaves or small edible flowers can add a charming springtime vibe. Don’t be afraid to experiment with crushed nuts or coconut flakes for additional texture contrasts that complement the chocolate and candy.
Side Dishes
Pair these nests with a light, fresh fruit salad to balance the sweet richness. A dollop of whipped cream or a scoop of vanilla ice cream also works beautifully, bringing creamy softness to contrast with the crisp meringue. For an extra indulgent experience, serve alongside a cup of rich hot cocoa or your favorite coffee blend.
Creative Ways to Present
Arrange the nests in a large decorative bowl lined with pastel-colored shredded paper to mimic a real bird’s nest for a fun Easter centerpiece. You can also place individual nests on dessert plates garnished with edible flowers or fresh berries for an elegant solopresentation that’ll impress guests at any gathering.
Make Ahead and Storage
Storing Leftovers
Store leftover nests in an airtight container at room temperature to keep them crisp and fresh for up to 3 days. Avoid refrigeration because moisture will soften the meringue, causing it to lose its crunch and delicate texture.
Freezing
You can freeze the baked nests, but it’s best to do so before adding melted chocolate and candy fillings. Place them in a freezer-safe, airtight container separated by parchment sheets, and freeze for up to a month. Thaw thoroughly at room temperature before decorating and serving.
Reheating
Meringue nests are best enjoyed as-is once baked and cooled. If you want to refresh their crispness after storage, pop them into a low oven (about 200°F/90°C) for 5 to 10 minutes, but keep a close eye to prevent browning. Avoid microwaving as it will make them chewy.
FAQs
Can I use regular sugar instead of granulated sugar?
Granulated sugar is best because it dissolves evenly in the egg whites, helping to stabilize the meringue. Powdered sugar or coarse sugars might affect the texture and stability, so stick with granulated for best results.
How do I know when the meringue is whipped enough?
When stiff peaks form, your meringue should hold its shape firmly without drooping when you lift the whisk. It will look glossy and smooth rather than grainy or runny—this is your green light to stop whipping.
Why do we bake the nests at such a low temperature?
Low-temperature baking allows the meringue to dry out slowly without browning or burning. This gentle heat keeps the inside soft and marshmallow-like while creating a crisp shell on the outside, which is signature to these nests.
Can I use milk or white chocolate instead of dark chocolate?
Absolutely! Milk or white chocolate will add a sweeter profile and different flavor notes. Just be mindful that white chocolate can be richer, so a lighter drizzle or balance with tangy fillings may work best.
How should I store the filled nests?
Once filled with candies and drizzled with chocolate, store the nests in a cool, dry place away from humidity. They are best enjoyed within a day or two of assembly since fillings can cause moisture build-up over time.
Final Thoughts
Nothing beats the joy of creating and sharing this Delightful Chocolate Meringue Easter Nests Recipe with those you love. It’s a cheerful, delicious way to celebrate the season, combining simple ingredients with playful presentation and fantastic flavor. I can’t wait for you to try it—these nests might just become your new holiday tradition!
Print
Delightful Chocolate Meringue Easter Nests Recipe
- Prep Time: 20 minutes
- Cook Time: 1 hour
- Total Time: 1 hour 20 minutes
- Yield: 12 servings
- Category: Dessert
- Method: Baking
- Cuisine: American
- Diet: Vegetarian
Description
These Delightful Chocolate Meringue Easter Nests are light, airy treats perfect for spring celebrations. Made with whipped egg whites and cocoa powder, baked gently at a low temperature to achieve a crisp outside and soft, marshmallow-like inside, then garnished with melted dark chocolate and colorful mini eggs or candies, these nests are a festive and delicious dessert for Easter or any special occasion.
Ingredients
Meringue Base
- 4 large egg whites
- 1 cup granulated sugar
- 2 tablespoons cocoa powder
Topping and Filling
- 4 oz dark chocolate, melted
- Mini eggs or colorful candies for filling
Instructions
- Preheat Oven: Preheat your oven to 225°F (110°C) and line a baking sheet with parchment paper to prevent sticking and allow easy removal of the meringue nests.
- Whip Egg Whites: In a clean, dry bowl, beat the egg whites until they become frothy. Gradually add the granulated sugar while continuing to beat until stiff peaks form, which should take about 5 to 7 minutes. This process is critical to achieve the right texture and stability for the meringue.
- Fold in Cocoa Powder: Carefully fold in the cocoa powder into the whipped egg whites. Do this gently to keep the meringue light and airy, avoiding deflating the mixture.
- Shape the Nests: Spoon the meringue mixture onto the prepared baking sheet, shaping each portion into a circular nest approximately 2 inches high. Create an indent in the center of each nest to hold the fillings later.
- Bake the Meringues: Bake the nests for 1 hour at the preheated temperature until they are dry to the touch but remain soft inside. This slow baking helps to set the structure without browning too much.
- Cool Completely: Allow the meringue nests to cool fully on the baking sheet before carefully removing them to maintain their delicate shape.
- Decorate and Fill: Drizzle the melted dark chocolate over the cooled nests. Then fill the indentations with mini eggs or your choice of colorful candies to create festive Easter nests ready to serve and enjoy.
Notes
- Ensure no yolk is in the egg whites, as fat can prevent proper whipping.
- Use a clean bowl and beaters for best results when whipping egg whites.
- Store meringue nests in an airtight container to keep them crisp until serving.
- You can substitute mini eggs with jelly beans or other small candies as desired.
- Be gentle while folding in cocoa powder to maintain the airy texture.
- Do not open the oven door during baking to avoid collapsing the nests.


