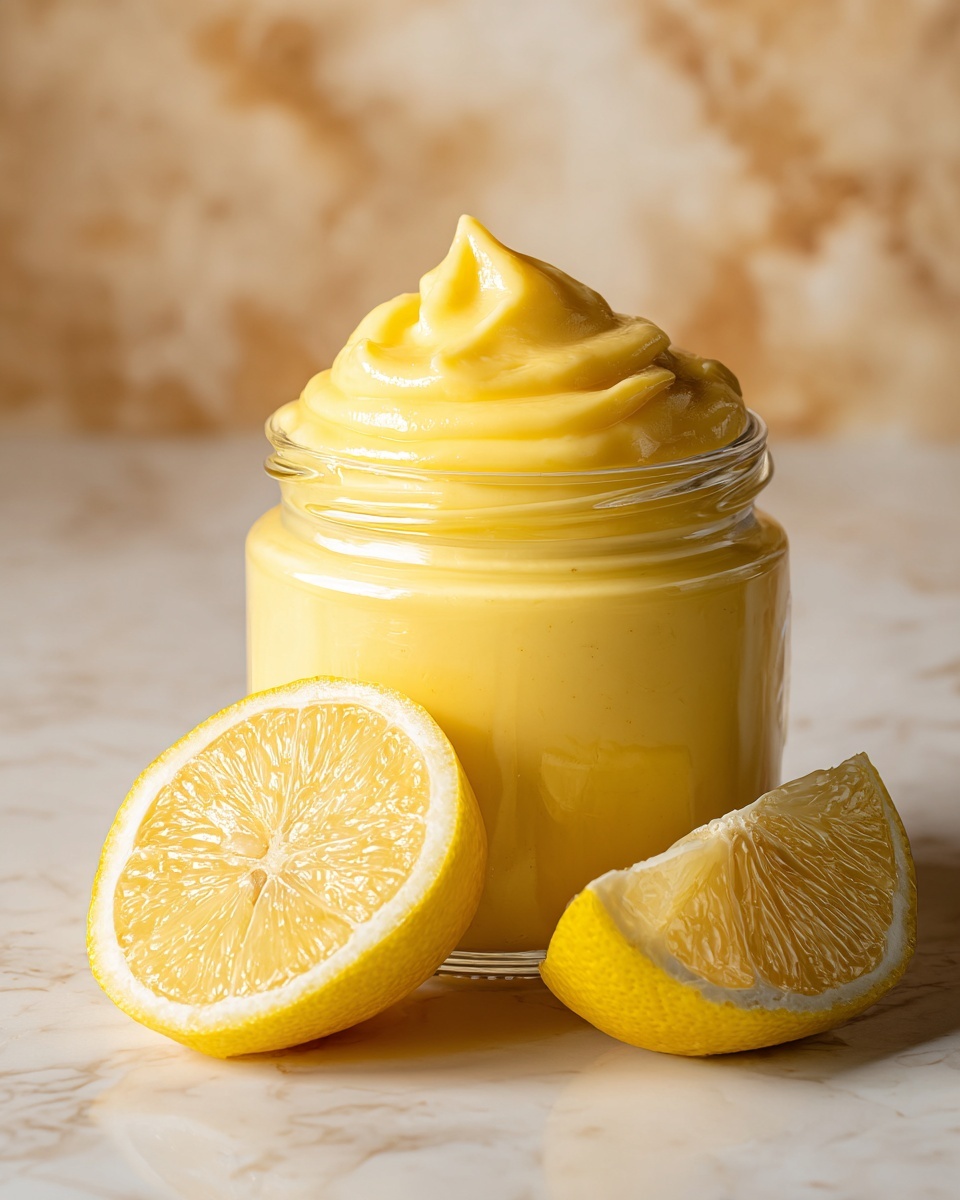
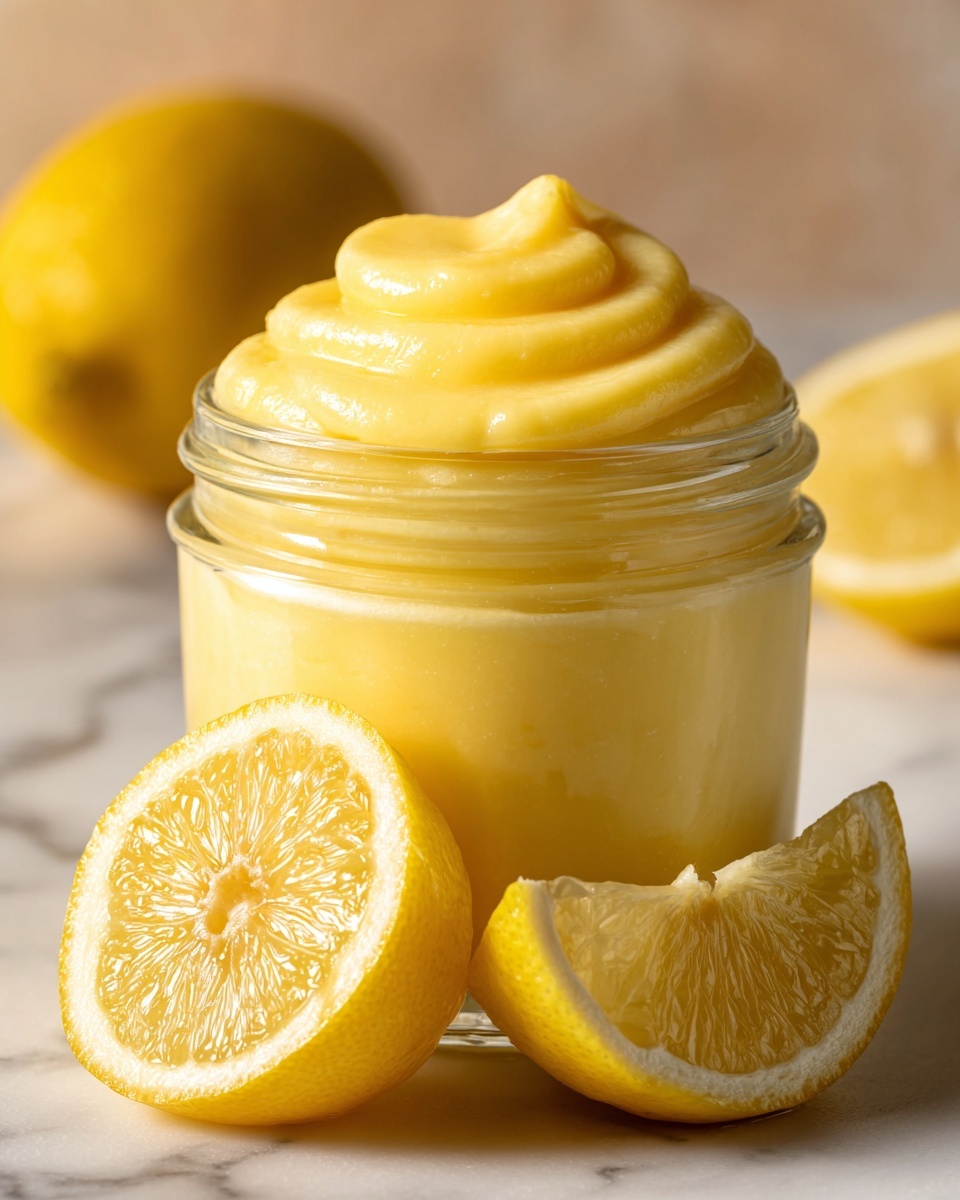
If you adore bright, tangy flavors that instantly brighten your day, then this Homemade Lemon Curd Recipe is destined to become your new kitchen favorite. Silky, luscious, and perfectly balanced between sweet and tart, this lemon curd bursts with the fresh essence of lemons and a creamy texture that’s simply irresistible. Whether you’re new to making curds or a seasoned lemon enthusiast, this recipe is straightforward, quick, and guarantees a delightful spread that’s miles better than anything store-bought.
Ingredients You’ll Need
Creating incredible lemon curd is all about using a handful of simple, high-quality ingredients, each playing a vital role. Fresh lemons give it that lively citrus punch, eggs bring richness and help set the custard, sugar sweetens just enough without overpowering, and butter adds a velvety finish that melts in your mouth.
- 3 large eggs: These provide the creamy custard base and help thicken the curd as it cooks.
- 1 cup granulated sugar: Sweetens the tart lemon juice while enhancing the texture with a smooth finish.
- 1/2 cup fresh lemon juice (about 2–3 lemons): Fresh juice is essential for that vibrant, natural lemon flavor and beautiful tang.
- 1 tablespoon lemon zest: Adds an extra layer of citrus fragrance and a subtle, mouthwatering bitterness.
- 6 tablespoons unsalted butter, cut into small pieces: Butter enriches the lemon curd, making it silky and luxurious.
How to Make Homemade Lemon Curd Recipe
Step 1: Whisk Eggs and Sugar
Start by whisking the eggs and sugar together in a saucepan, making sure they become smooth and creamy. This step sets the foundation for a silky lemon curd, ensuring the sugary sweetness is evenly distributed and the eggs don’t scramble later on.
Step 2: Add Lemon Juice and Zest
Next, stir in the fresh lemon juice and zest. This is where the lemon curd really starts to come alive, combining bright fruity notes with the richness of the eggs and sugar for that perfect tangy punch.
Step 3: Cook Over Medium-Low Heat
Place the saucepan over medium-low heat and cook the mixture, stirring constantly. This step is crucial because the constant stirring keeps the curd creamy and prevents it from sticking or developing lumps. Cook just until the mixture thickens and coats the back of your spoon, about 8–10 minutes. Resist the urge to let it boil, or the eggs might curdle and ruin that smooth texture you’re after.
Step 4: Incorporate Butter
Remove the pan from heat and whisk in the butter pieces one by one. This step enriches the curd, adding a dreamy, buttery silkiness. Whisk until all the butter is fully melted and combined for that melt-in-your-mouth finish.
Step 5: Strain and Cool
For the ultimate smooth texture, strain the lemon curd through a fine mesh sieve. This catches any bits of zest or cooked egg, leaving you with a glossy pudding-like curd. Let it cool slightly before transferring it to your container, then refrigerate to thicken further.
How to Serve Homemade Lemon Curd Recipe

Garnishes
A dollop of whipped cream and a sprinkle of finely chopped fresh mint are perfect garnishes that not only add color but enhance the fresh, citrusy flavors of your lemon curd. Thin lemon slices or candied lemon peel also make a lovely visual and tasty touch.
Side Dishes
This lemon curd shines beautifully alongside warm scones or fresh buttery biscuits, turning breakfast or teatime into a special occasion. You can also spread it over toast, muffins, or layered into pancakes for an irresistible citrus boost.
Creative Ways to Present
Imagine swirling this lemon curd into Greek yogurt with granola for an easy parfait or folding it into whipped cream to create a delightful lemon mousse. Use it as a filling for tarts, cupcakes, or even spread between cake layers to surprise everyone with bursts of tangy bliss.
Make Ahead and Storage
Storing Leftovers
Your homemade lemon curd will keep beautifully in the refrigerator for up to two weeks when sealed in an airtight container. This gives you plenty of time to enjoy it on different dishes or simply as a quick sweet treat.
Freezing
While lemon curd can be frozen, it may change slightly in texture once thawed, becoming a bit grainy. If you want to freeze it, place it in a tightly sealed container, leaving some headspace, and thaw overnight in the refrigerator before use.
Reheating
Gently warm your lemon curd in a bowl over simmering water or in short bursts in the microwave, stirring regularly. Be careful not to overheat, as high temperatures can cause curdling and ruin its silky texture.
FAQs
Can I use bottled lemon juice instead of fresh?
Fresh lemon juice is strongly recommended for the best flavor and brightness, but if necessary, bottled juice can be a substitute. Just be aware that the flavor might be less vibrant and the result slightly less fresh.
Why did my lemon curd turn out lumpy?
Lumpy lemon curd is usually caused by cooking on too high heat, which can scramble the eggs. Stirring constantly over medium-low heat and removing the curd from heat promptly once thickened will prevent lumps.
What can I use lemon curd for besides toast?
Beyond toast, lemon curd is incredible in cakes, tarts, scones, as a yogurt mix-in, or even as a topping for ice cream, pancakes, and waffles. Its versatility makes it a must-have in your refrigerator.
Is homemade lemon curd gluten-free?
Yes! This recipe contains only natural ingredients without any gluten, making it safe for a gluten-free diet. Just double-check any accompaniments or serving ideas for gluten content.
Can I reduce the sugar for a tarter lemon curd?
Absolutely! Adjusting the sugar down a bit will create a tarter curd that’s more lemon-forward. Just be cautious about reducing sugar too much, as it helps with the curd’s texture and preservation.
Final Thoughts
There’s nothing quite like the satisfaction of making this Homemade Lemon Curd Recipe from scratch. It’s a beautiful balance of sweet and tart with a silky texture that’s sure to delight anyone lucky enough to taste it. Once you try it, you’ll wonder how you ever enjoyed lemon curd from a jar. So go ahead, give it a whirl, and get ready to add a new favorite to your culinary repertoire!
Print
Homemade Lemon Curd Recipe
- Prep Time: 5 minutes
- Cook Time: 10 minutes
- Total Time: 15 minutes
- Yield: About 1 1/2 cups
- Category: Condiment, Dessert
- Method: Stovetop
- Cuisine: British
- Diet: Vegetarian, Gluten Free
Description
This homemade lemon curd is a smooth, tangy, and luscious spread made from fresh lemons, eggs, sugar, and butter. Perfect as a topping for scones, a filling for cakes and tarts, or simply spread on toast, this classic British recipe offers a bright citrus flavor that is easy to prepare using simple stovetop cooking. It is vegetarian and gluten-free, making it suitable for a variety of diets.
Ingredients
Ingredients
- 3 large eggs
- 1 cup granulated sugar
- 1/2 cup fresh lemon juice (about 2–3 lemons)
- 1 tablespoon lemon zest
- 6 tablespoons unsalted butter, cut into small pieces
Instructions
- Mix eggs and sugar: In a medium saucepan off the heat, whisk together the eggs and sugar until the mixture is smooth and well combined.
- Add lemon: Stir in the fresh lemon juice and lemon zest, whisking to fully integrate the flavors.
- Cook curd: Place the saucepan over medium-low heat. Stir constantly with a silicone spatula or wooden spoon to prevent curdling, cooking the mixture for about 8 to 10 minutes until it thickens enough to coat the back of the spoon. Avoid boiling the mixture to maintain a smooth texture.
- Incorporate butter: Remove the saucepan from the heat and immediately add the small pieces of butter one at a time, whisking continuously until fully melted and combined into a silky curd.
- Strain the curd: Pour the lemon curd through a fine mesh sieve into a bowl to remove any cooked egg bits or zest, ensuring a velvety consistency.
- Cool and store: Let the curd cool slightly before transferring it into a jar or airtight container. Refrigerate for at least one hour to allow it to thicken further before serving.
Notes
- Lemon curd can be stored in the refrigerator for up to two weeks.
- Use it as a filling for cakes, tarts, or scones, or simply spread on toast for a delicious treat.
- To increase tartness, reduce the amount of sugar slightly.

